I thought you might like to watch my work as it goes through the various steps toward completion.


Here are some of the steps I went through when creating my first animal sculpture: a whimsical cat “Fashion Kitty.” After sculpting the body of Laguna Clay Company’s Mexo White clay, I used acrylic paint to color the little darling. Then, I decided she needed some arms, and they really needed to be red & white stripes! I eventually attached the arms with curled wire and added some stylin’ earrings, and voila!


These bowls and masks are made of “house white” clay at the American Museum of Ceramic Art, in Pomona, CA. (That means they are made of the left-over bits of white clay we studio artists didn’t use. We put or “leavings” in a huge plastic drum, and the clay is run through a “pugging” machine, packaged in plastic, and re-sold to us artists. It’s wonderful recycling!) These objects have had a reddish mason’s stain applied to them, and the smallest bowls have also had under glazes painted on them. I was SUPPOSED to be selling these at tomorrow’s Padua Hills Art Show, but I started them too late, and we actually had 2 days of rain last week. Rats! Rain causes clay to retain it’s moisture, and I needed the clay to dry out so that I could fire it in the kiln. If you put moist clay into a kiln, your pieces literally BLOW UP as the moisture turns to steam.

I sometimes sculpt my larger figures in several pieces in stage 1, which is being allowed to dry, before I attach the head to the torso. The drying process can take 3-6 weeks. If you put a piece into the kiln and fire it before it’s chalky-dry, it can blow up or develop cracks, as the trapped moisture in the clay tries to escape as steam! When it’s appropriately dry, it’s referred to as greenware. Below, it’s assembled & waiting to be bisque-fired at the American Museum of Ceramic Art Studio.


Next, her face and the interior of her torso have been stained with mason’s stains. I’ve applied blue under glaze to her bodice, green to interior and yellow & brown to the underside of her bowl/hat. Before I apply a flesh tone under glaze to her face, I coat her eyes and lips with liquid wax, just in case I over-paint the flesh tone, I won’t ruin the job I’ve done painting the fine details of her eyes & lips. (The chalkiness on her eyes & lips is the white wax.) 10 minutes later, I under glazed her sleeves in white & her face in flesh tone, and then I coated all of her in clear, matte glaze. That night, she was fired to cone 5.

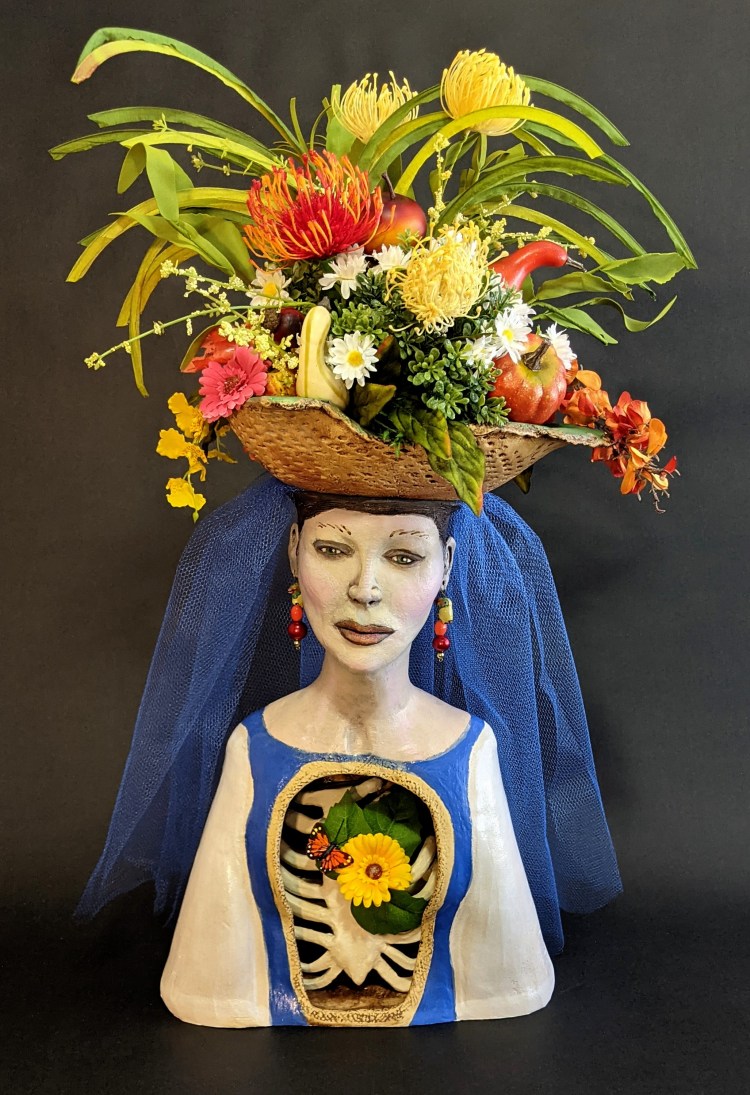
I painted her face & rib cage with outdoor-quality acrylic paint, made her a pair of large-bead earrings, and created a silk floral arrangement for the ceramic basket on her head. Her rib cage rests inside her torso and is removable. Currently, I’ve wired a leaf, flower, and butterfly to her ribs. They are not permanently attached because I like to offer my patrons the opportunity to “participate” in the creation of my artworks by letting them change out the additional elements like earrings, and floral details. It’s fun to have sculptures change with the seasons!

I was asked to make some sculptures for Halloween 2022. In June 2022, when I visited a friend in San Francisco, he gave me some wooden boxes that used to hold expensive liquor which gave me the idea to use them with some ghoulish figures to create a Ghoul-in-a-box Series. I sculpted crazy little figures from Laguna Mexican air-dry clay.


I decorated the wooden boxes with paper, stamps, & antiquing medium, to make them look old. I had fun experimenting with acrylic paints to give life to my little ghouls!


This was my 3rd foray into working with Laguna paper clay. I love it! It’s like sculpting with butter! I like to leave the tops of my figures’ heads open because they look fabulous with flowers crowning them, and you can change the flowers with the seasons. “Cutie & the Death Moth” lives in an antique drawer.


“Bella with Butterflies” in the fresh, wet, first stage of sculpting. She’ll need to dry for several weeks before bisque-firing.

“Ruby Tuesday with Butterflies” Roger’s Gardens (in Corona del Mar) commissioned me to create several sculptures for their Spring Display. It will take me a month to complete her.
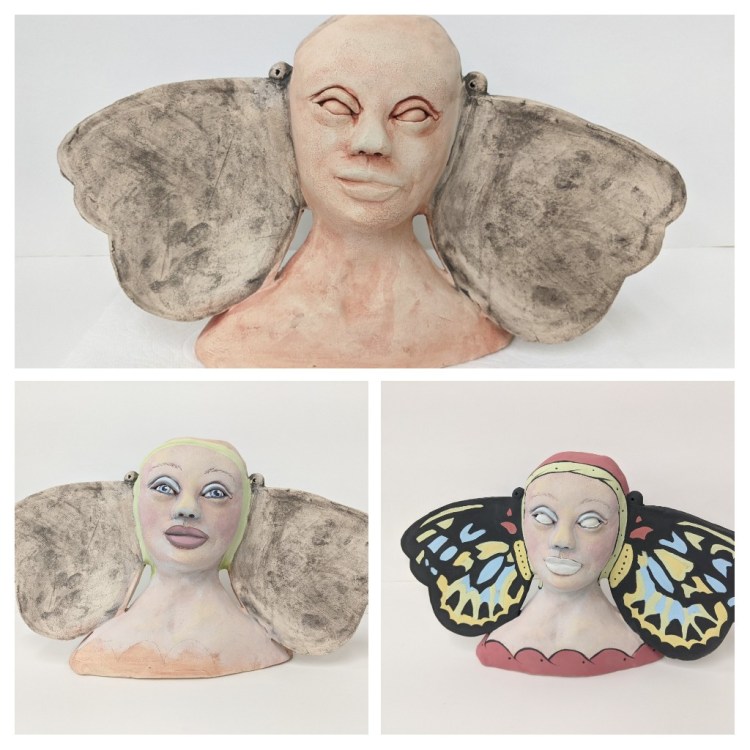
Top: mason’s stains applied to bisque-fired figure.
Left: under glazes applied to face.
Right: I apply shiny clear glaze to the eyes & lips, then a coat of white wax on top of that clear glaze BEFORE I apply colored under glazes to the rest of the head, so I can’t accidentally slop/drip the wrong colored under glaze on the eyes or lips. In the firing, the wax will melt off and evaporate, leaving the shiny clear glaze.

Final step: I apply 3 coats of clear glazes on top of the colored under glazes: I used matte finish for the face…shiny for the rest.


This little gal breaks my heart. Her face blew off in the kiln because I didn’t wait long enough for her to completely dry before firing her. At least she lives on in these photos.
